You have no items in your shopping cart.
Transducer Installation Guide
The position of your Transducer is important for you to get the best reading.
Three types of Transducer are available include Bronze (made for timber and fibreglass hulls), Plastic (made for fibreglass, steel or alloy hulls) and Stainless Steel (made for steel or alloy hulls). Internally, the units are typically filled with urethane filler.
The boat's Hull construction and length will determine whether you need a Transom Mount, Thru-Hull, In-Hull, Pod or Pocket/Keel Transducer.
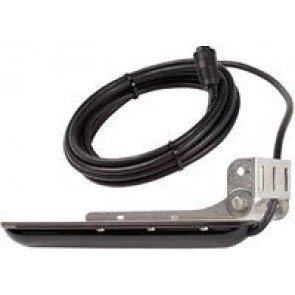
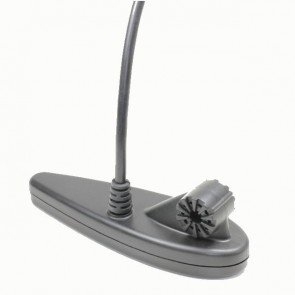
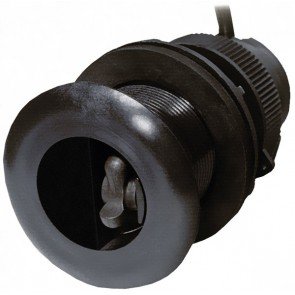
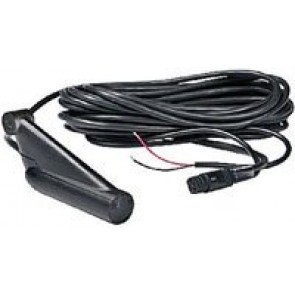
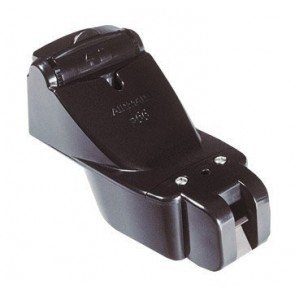
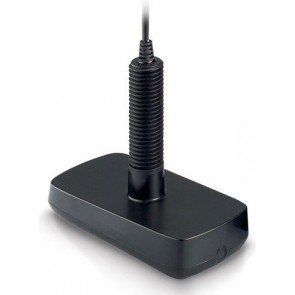
Transom Mount Transducers
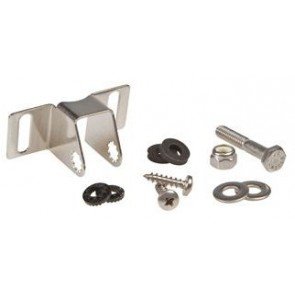
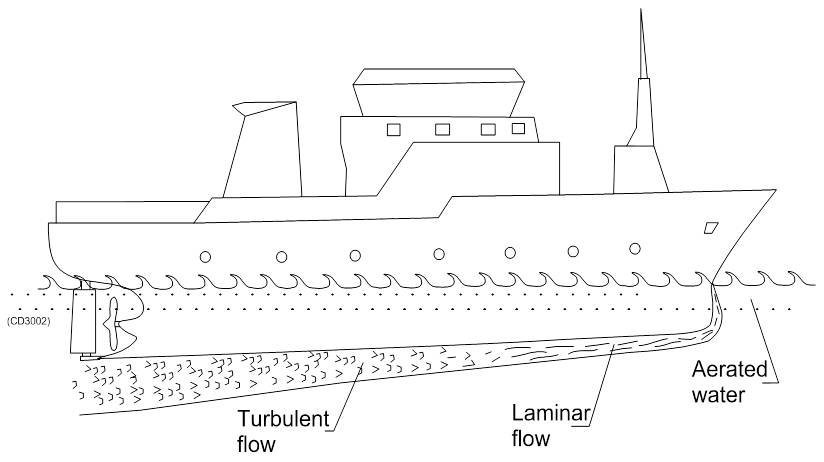
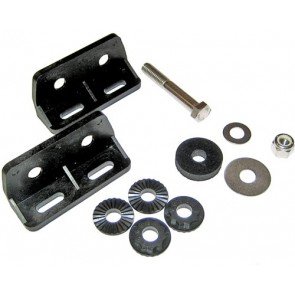
When mounting on the Transom, be sure to use a straight edge to locate the Transducer so that it sits slightly lower than the Hull. Fix the mounts so that the screws are midway in the slots (as shown in images on the right). Look for an area of least turbulance when >Underway. Note: Don't mount behind any Planing straices or Scuppers that may be on your Hull. Popular Transom Mount Transducers include the Airmar P66 and TM260.
Finding Faults in Transom Mount Transducers
- 1. If experiencing interference with a Transom mounted Transducer, you must test drive the vessel to determine what speed the image is lost at.
- 2. Move the Transducer to its lowest position and retest. If screen image is improved repeat until you are satisfied with results.
- 3. If screen image gets worse, move Transducer up and re‐test until improvement is seen.
- 4. Perform a slow but constant turn to the side of the Hull that the Transom Transducer is mounted. Gradually increase Rate of Turn. If screen image improves the Transducer needs to be mounted lower in the water.
- 5. If screen image is worse when turning to the same side as the Transducer try turning the opposite direction. This would indicate the Transducer needs to be mounted higher in the water.
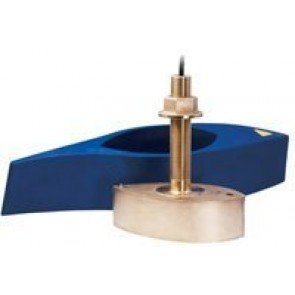
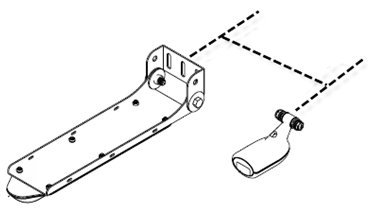
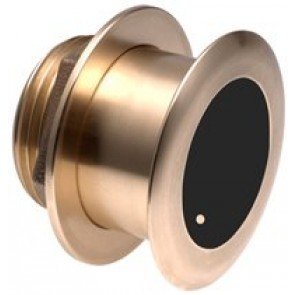
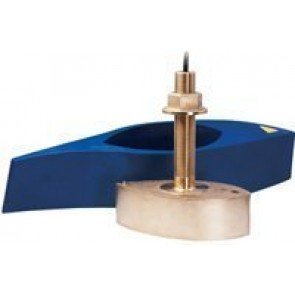
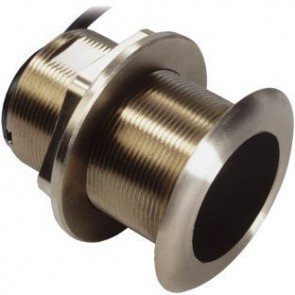
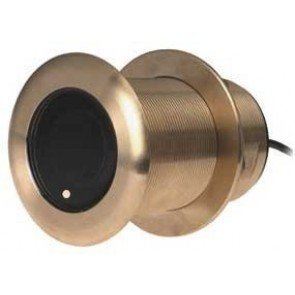
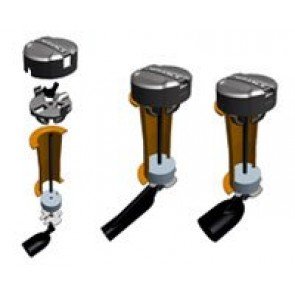
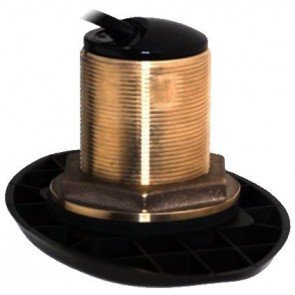
Thru-Hull
Thru-Hull Transducers are enhanced by the use of a Fairing Block. This keeps the Transducer face parallel with the seafloor and improves high speed operation by creating a smooth water flow around the Transducer. These generally give better readings at speed and in a >Following Sea. Popular models include the B60 and B164.
Also a Thru-Hull Transducer can come with a tilted element for flush mounting on a Deep V Hull without the need of a Fairing Block. The tilt element allows the internal ceramic to be tilted for flush mounting. tilt element Transducers can allow a smaller trailer Boat to use higher quality transducers, with the lower acoustic Noise benefits of a Thru-Hull mounting over Transom mounting installation.
![]()
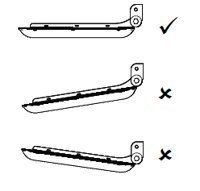
The Keel arrow needs to point at the Keel and not in the direction that the Keel runs.
Points to be aware of with Thru-Hull mounting are:
- 1. Cored hulls are important to seal the exposed core and provide sufficient support for the Transducer Hull nut to clamp against.
- 2. Always check for Hull openings or projections in front of the mounting location. It's very difficult to move a Thru-Hull Transducer once it has been fitted.
- 3. Don't mount Transducers in areas prone to Noise or vibration.
- 4. Be aware of Hull lifting points or roller points if a vessel is trailered.
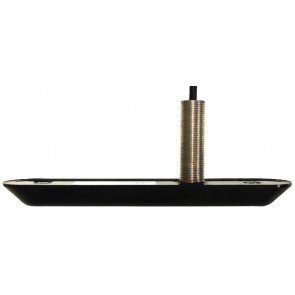
In-Hull
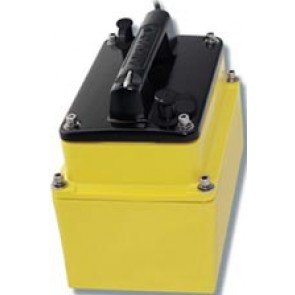
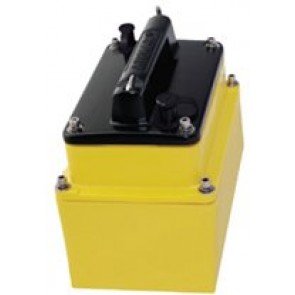
In-Hull Transducers should be contained in a tank cut to match the Deadrise of the vessel, which is filled with Propylene Glycol (marine antifreeze). The tanks should then be bonded to the Hull using fibreglass Resin. Popular models include the P79 and M260.
In-hull Transducers must also be fitted in location before fixing the tank. To find the best place to put it you can use one of three methods:
- flood the Bilge area
- put the Transducer into the bag and fill it with water
- Use a water based lubricant to temporarily 'stick' the Transducer in place
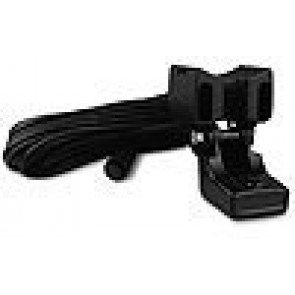
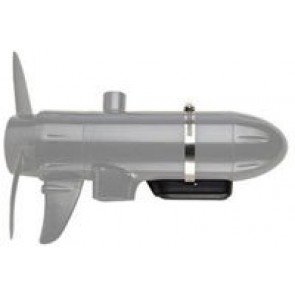
Pod
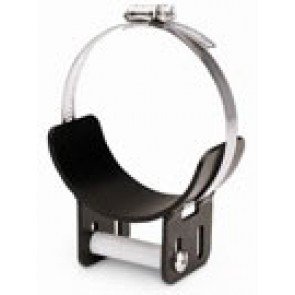
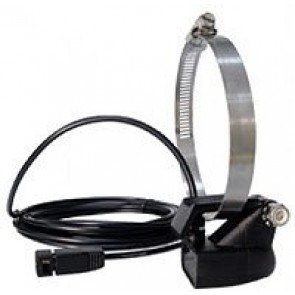
Pod Transducers are designed to be fitted on Trolling motors, they attach via a large clamp assembly to the motor housing. It is important that enough free cable is left at the top of the motor to ensure it can turn freely.
![]()
Pocket/Keel
Pocket or Keel Transducers are normally only used on commercial vessels. These Transducers have a housing that is designed to flush mount in an external Hull blister or directly in the Keel. We recommend that these are mounted towards the front of the Boat around the second Bow wave.
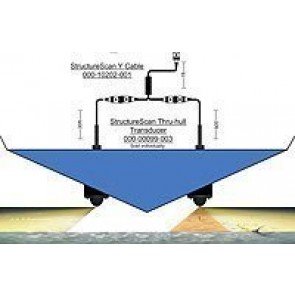
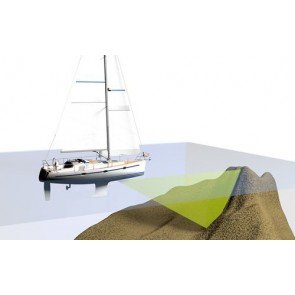
StructureScan
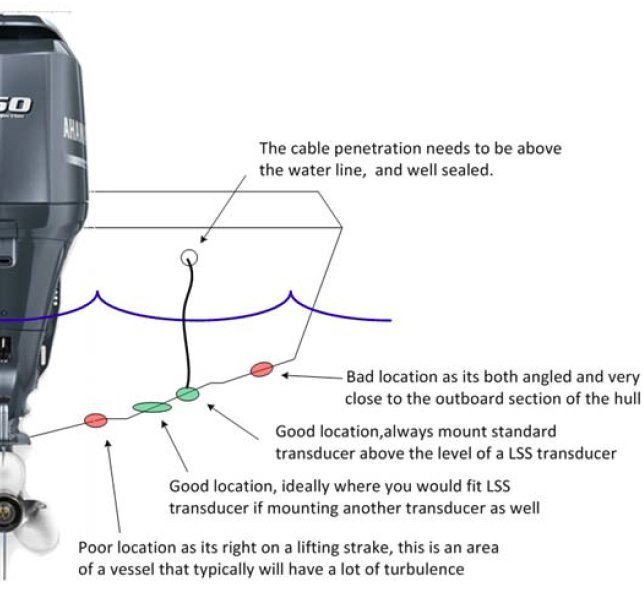
Some brands such as Humminbird have a 3 in 1 Transducer however Lowrance/Simrad have a separate Sideimage/Downimage Transducer. This is used on all NSS and HDS series. Available in Transom Thru-Hull in plastic or bronze. LSS-2 StructureScan Transducer specifically needs to be parallel with the Waterline when the vessel is at optimum speed. Transducer should be within 300mm of the Echosounder (if used) and at the same point Fore/Aft to ensure that structure overlay is accurate. StructureScan Transducers should be on the inboard side of the Echosounder Transducer to avoid obstruction of the Beam.
Mounting your Transducer:
- 1. Mount on the Southboard side of the vessel if the prop is clockwise turning (95%) this means that water is flowing over the top of the Transducer.
- 2. Never mount inline with a Hull projection like a water intake.
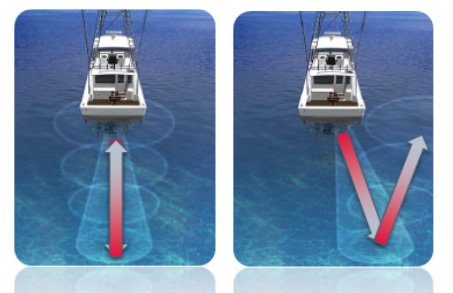
- 3. Have a small amount of kickdown on the Transducer, around 2-5 degrees is good (as seen in the images on the right). This ensures a clean flow of water hits the Transducer face.
- 4. Before mounting, take the Boat for a run and look for a smooth flow area at the Transom of the Boat.
- 5. Remember to account for trailer rollers or lifting points when mounting Thru-Hull transducers.
- 6. For stepped hulls, the Transducer needs to be mounted on the first Step and have enough room to kick up if struck.
Adjust the transducer so that it has around a 3-5 degree tail low tilt
Related Products
-
Humminbird Down Imaging Temperature Transducer
RRP: $609.00
NOW: $552.00
-
Transducer Mounting Kit
RRP: $75.90
NOW: $72.15
-
B164 1kW Tilted Element Transducer
-
B260 1kW Thru Hull Transducer
-
B265 Chirp Thru Hull Transducers
-
B60 600W Tilted Thru Hull Transducer
-
B75 CHIRP Single Frequency Thru Hull Transducers
-
B&G DST800 Thru Hull Transducer (Discontinued)
-
DST800 Replacement Paddle Wheel Kit
$58.50 -
Lowrance SS Accessories - Y Cable - required for 2 T/H Transducers (Discontinued)
-
Lowrance Structure Scan LSS-2 Transducer Only
RRP: $303.00
NOW: $286.00
-
Lowrance Plastic Thru Hull Structure Scan Transducer (Discontinued)
-
Lowrance 10' T/M Transducer Extension Cable - 9 pin Black
RRP: $92.99
NOW: $90.00
-
Lowrance DSI Skimmer Transducer
RRP: $185.99
NOW: $179.00
-
Lowrance HS WS Transducer Mounting Bracket
$22.00 -
Lowrance Kayak Scupper Transducer Mount
$65.00 -
Lowrance Transducer Option - 50/200 Transducer Mounting Kit (Suits ESA930)
$26.00 -
Lowrance DSI Transducer Trolling Motor Mount
$39.00 -
Uniplug to Blue Transducer Adaptor Cable
$38.50 -
Lowrance Transducer Adaptor Cable
$30.00 -
Navman to Lowrance Transducer Adaptor Cable (Discontinued)
-
Furuno FCV587 Fishfinder (Discontinued)
-
Furuno Airmar Transducers
-
Garmin Transducers
-
Navico ForwardScan Sonar Transducer
RRP: $1,128.00
NOW: $1,072.00
-
R509LHW Broadband CHIRP Transducer
RRP: $7,761.99
NOW: $6,986.00
-
Humminbird 1157CX Fish Finder/Chart Plotter Combo (Discontinued)
-
Humminbird 1158cx DI Fishfinder GPS Chartplotter Combo (Discontinued)
-
Humminbird 1158cx HD XD Combo (Discontinued)
-
Humminbird 1159cx HD DI Combo (Discontinued)
-
Humminbird 1159cx HD XD Combo (Discontinued)
-

Humminbird 1197cx Side Imaging Combo (Discontinued)
-
Humminbird 1198cx Side Imaging Combo (Discontinued)
-
Humminbird 1199cx HD SI Combo (Discontinued)
-
Humminbird 345CX DI Fishfinder (Discontinued)
-
Humminbird 345CX Fishfinder (Discontinued)
-
Humminbird 365Xi Combo (Discontinued)
-
Humminbird 385cxi DI Fishfinder GPS Chartplotter Combo (Discontinued)
-
Humminbird 385CXi Fishfinder/Plotter Combo (Discontinued)
-
Humminbird 398CXI SI Combo (Discontinued)
-
Humminbird 550x Fishfinder (Discontinued)
-
Humminbird 561x Fishfinder (Discontinued)
-
Humminbird 570X DI Fishfinder (Discontinued)
-
Humminbird 570x Fishfinder (Discontinued)
-
Humminbird 587cxi HD Combo (Discontinued)
-
Humminbird 587cxi HD DI Combo (Discontinued)
-
Humminbird 596cx HD DI Fish Finder (Discontinued)
-
Humminbird 596cx HD Fishfinder (Discontinued)
-

Humminbird 597CXi HD Combo (Discontinued)
-
Humminbird 597cxi HD DI Combo (Discontinued)
-
Humminbird 597cxi HD XD Combo (Discontinued)
-
Humminbird 598CXi HD SI Combo (Discontinued)
-
Humminbird 678cx HD DI Fishfinder (Discontinued)
-
Humminbird 678cx HD Fishfinder (Discontinued)
-
Humminbird 688cx HD Combo (Discontinued)
-
Humminbird 688cx HD DI Combo (Discontinued)
-
Humminbird 698cx HD SI Combo (Discontinued)
-
Humminbird 718x Fishfinder (Discontinued)
-
Humminbird 728x Fishfinder (Discontinued)
-
Humminbird 778cx HD Fish Finder (Discontinued)
-
Humminbird 778CX HD XD Fishfinder (Discontinued)
-
Humminbird 788CXI HD DI Fishfinder Plotter Combo (Discontinued)
-

Humminbird 788CXI HD Fishfinder Plotter Combo (Discontinued)
-
Humminbird 788cxi HD XD Combo (Discontinued)
-
Humminbird 798cx Side Imaging Combo (Discontinued)
-
Humminbird 798cxi HD Side Imaging Combo (Discontinued)
-
Humminbird 858CX DI Combo (Discontinued)
-

Humminbird 858cx Fishfinder/Plotter Combo (Discontinued)
-
Humminbird 858CX HD DI Combo (Discontinued)
-
Humminbird 859cx HD DI Combo (Discontinued)
-
Humminbird 898c Side Imaging Combo (Discontinued)
-
Humminbird 898CX HD Side Imaging Combo (Discontinued)
-
Humminbird 899CXI HD SI Combo (Discontinued)
-
Humminbird 958CX DI Combo (Discontinued)
-
Humminbird 958cx Fishfinder/Plotter Combo (Discontinued)
-
Humminbird 958CX HD DI Combo (Discontinued)
-
Humminbird 958CX HD XD Combo (Discontinued)
-
Humminbird 959CX HD DI Combo (Discontinued)
-
Humminbird 959CX HD XD Combo (Discontinued)
-
Humminbird 987csi Combo (Discontinued)
-
Humminbird 997cx Side Imaging Combo (Discontinued)
-
Humminbird 998CX HD Side Imaging Combo (Discontinued)
-

Humminbird 998cx Side Imaging Combo (Discontinued)
-
Humminbird 999cxi HD SI Combo (Discontinued)
-
Humminbird Matrix 12x Fishfinder (Discontinued)
-
Humminbird Onix 10 SI Touch Combo (Discontinued)
-
Humminbird Onix 10 Touch Combo (Discontinued)
-
Humminbird Onix 8 SI Touch Combo (Discontinued)
-
Humminbird Onix 8 Touch Combo (Discontinued)
-
Humminbird Plastic Thru Hull Transducers
-
Humminbird Trolling Motor Mount Transducers
-
Lowrance Bronze HDI Tilted Transducers (Discontinued)
-
Lowrance Elite 4 DSI Fishfinder Plotter (Discontinued)
-
Lowrance Elite 4 Fishfinder Plotter (Discontinued)
-
Lowrance Elite 4 HDI Fishfinder/Plotter (Discontinued)
-

Lowrance Elite 4x DSI Fishfinder (Discontinued)
-
Lowrance Elite 4x Fishfinder (Discontinued)
-
Lowrance Elite 4x HDI Fishfinder (Discontinued)
-
Lowrance Elite 5 DSI Fishfinder/Plotter (Discontinued)
-
Lowrance Elite 5 Fishfinder/Plotter (Discontinued)
-
Lowrance Elite 5 HDI Fishfinder/Plotter (Discontinued)
-
Lowrance Elite 5x DSI FishFinder (Discontinued)
-
Lowrance Elite 5x Fishfinder (Discontinued)
-

Lowrance Elite 5x HDI Fishfinder (Discontinued)
-
Lowrance Elite 7 HDI Fishfinder/Plotter (Discontinued)
-
Lowrance Elite 7x HDI Fishfinder (Discontinued)
-

Lowrance Fish Finder HDS5X (Discontinued)
-
Lowrance HDS 10 Gen2 Fishfinder Plotter (Discontinued)
-
Lowrance HDS5 Gen2 Fishfinder Plotter (Discontinued)
-
Lowrance HDS 5x Gen2 Fishfinder (Discontinued)
-
Lowrance HDS7 Gen2 Fishfinder Plotter (Discontinued)
-
Lowrance HDS 8 Gen2 Fishfinder Plotter (Discontinued)
-
Lowrance HDS10 Fishfinder/Plotter (Discontinued)
-
Lowrance HDS12 Gen2 Touch Combo (Discontinued)
-
Lowrance HDS5 Fishfinder/Plotter (Discontinued)
-
Lowrance HDS7 Fishfinder/Plotter (Discontinued)
-
Lowrance HDS7 Gen2 Touch Combo (Discontinued)
-
Lowrance HDS8 Fishfinder/Plotter (Discontinued)
-
Lowrance HDS9 Gen2 Touch Combo (Discontinued)
-
Lowrance Mark 4 Fishfinder Plotter (Discontinued)
-
Lowrance Mark 5x DSI FishFinder (Discontinued)
-
Lowrance Mark 5x Fish Finder (Discontinued)
-
Lowrance 7pin Transducer Extension Cables
-
Lowrance Transducers
-
Lowrance Transom Mount HDI Transducers
-
M260 1kw In Hull Transducer
-
M265 Chirp In Hull Transducers
-
Simrad NSE12 (Discontinued)
-
Simrad NSE8 (Discontinued)
-

Simrad NSS12 Sport (Discontinued)
-
Simrad NSS7 evo2 Combo (Discontinued)
-
Simrad NSS7 Sport (Discontinued)
-
Simrad NSS8 Sport (Discontinued)
-
Simrad NSS9 evo2 Combo (Discontinued)